|
Hair/Wig Cap
The wig cap will be crocheted to fit around the head stopping right before you get to the point where you start decreasing.
Rnd 1: In brown, make an adjustable ring and work 5 sc in the ring, do not join, place marker to mark the first stitch of the next rnd: 5 sc.
Rnd 2: [2 Sc in each sc] 5 times: 10 sc.
Rnd 3: [Sc in next sc, 2 sc in next sc] 5 times: 15 sc.
Rnd 4: [Sc in next 2 sc, 2 sc in next sc] 5 times: 20 sc.
Rnd 5: [Sc in next 3 sc, 2 sc in next sc] 5 times: 25 sc.
Rnd 6: [Sc in next 4 sc, 2 sc in next sc] 5 times: 30 sc.
Rnd 7: [Sc in next 5 sc, 2 sc in next sc] 5 times: 35 sc.
Rnd 8: [Sc in next 6 sc, 2 sc in next sc] 5 times: 40 sc.
Rnd 9: [Sc in next 7 sc, 2 sc in next sc] 5 times: 45 sc.
Rnds 10 and 11: Dc in each st around ----- 45 sts.
Fasten off, and leave a length to sew the cap to the head after youve made the hair. After attaching the wig cap to the head, cut a length of yarn that you are comfortable working with and begin to embroider a hairstyle onto the head. The easiest way I find to do this is to decide where the hair part will be and then do one side at a time with each piece of yarn, going back and forth filling in one side of the head making sure there are no gaps until you run out of yarn. Each time you run out of yarn, rethread the needle and work on the opposite side to ensure that youre filling in the hair evenly. Continue to do this until you are satisfied with the appearance of the hair and fasten off that last piece of yarn and weave it into the hair hiding the end.
Body
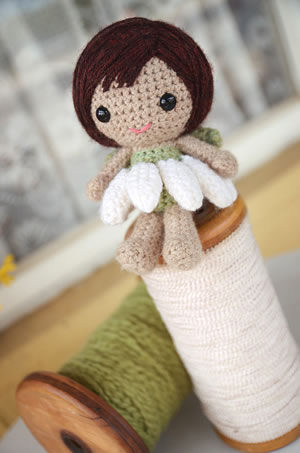
After making the two arms and legs, the body will just be a torso, then the petals and wings will be crocheted and sewn on.
Arms (make 2)
Rnd 1: In flesh color, make an adjustable ring and work 6 sc in the ring, do not join, place marker to mark the first stitch of the next rnd: 6 sc.
Rnd 2: [Sc, 2 sc in next sc] 3 times: 9 sc.
Rnd 3: Tr in next sc, sc2tog, [sc in next sc, sc2tog] 2 times: 6 sts.
Rnds 4-10: Sc in each st around.
Fasten off leaving a length of yarn to sew the arm to the body. Do NOT stuff the arm. Put aside until youve finished with the body.
Legs (make 2)
Rnd 1: In flesh color, make an adjustable ring and work 7 sc in the ring; join with slip st to first sc; place marker to mark the first stitch of the next rnd: 7 sc.
Rnd 2: 2 Sc in first sc, 2 hdc in next sc, 2 sc in next sc, sc in last 4 sc; do not join, begin working in continuous rnds: 10 sts.
Rnd 3: Sc in first sc, 2 sc in next sc, 2 hdc in each of next 2 hdc, 2 sc in next sc, sc in next 5 sc: 14 sts.
Rnd 4: Sc in first 3 sc, sc2tog twice, sc in next 7 sc: 12 sc.
Rnd 5: Sc in first 2 sc, sc2tog twice, sc in next 6 sc: 10 sc.
Rnds 6-10: Sc in each sc around.
Fasten off leaving a length of yarn to sew the leg to the body. Stuff the foot and leg to capacity.
| จากคุณ |
:
mihana  
|
| เขียนเมื่อ |
:
30 ก.ค. 54 15:53:51
|
|
|
|
|